Are you ready to take control of your email communications with a robust and scalable solution? Enter Postal, a powerful open-source mail server designed for keen tech enthusiasts and developers. With the upcoming Ubuntu 24.04 on the horizon, there’s no better time to learn how to install and configure this dynamic tool for your email activity needs.
In this guide, we’ll walk through each step needed to set up Postal on Ubuntu 24.04. Whether you’re familiar with managing server tasks or dipping your toes into the world of Linux servers for the first time, we’ve got you covered with easy-to-follow instructions.
From initial installation to customizing its configuration for optimal performance, this post provides all the essential details. Dive in to explore how Postal can transform your email handling operations into a seamlessly efficient process. Adjust your settings, manage your emails, and get ready to unleash the full potential of Postal on your Ubuntu 24.04 system!
Installing Postal on Ubuntu 24.04
Let’s dive directly into the action to get Postal up and running on Ubuntu 24.04. Before we begin, ensure your server is ready with a fresh installation of Ubuntu 24.04, and you have root access or the ability to use sudo commands.
First, update your system packages to make sure all components are up-to-date. Open your terminal and run:
sudo apt update && sudo apt upgrade -yNext, you’ll need to install the necessary dependencies like Ruby and Node.js. This is crucial since Postal relies on these technologies:
sudo apt install ruby-full nodejs -yNow, clone the Postal repository to your server using Git:
git clone https://github.com/postalhq/postal.git /opt/postalOnce cloning is complete, switch to the Postal directory:
cd /opt/postalYou’ll need a database for Postal, typically MySQL. Make sure it’s installed and create a new database alongside a user with full privileges.
Finally, install Postal’s dependencies and initialize the configuration:
bundle install

postal initialize-config
That’s it! Now your Postal environment is ready, and you can move on to configuring it to fit your needs.
Configuring Postal Dependencies
With Postal installed, it’s time to ensure all dependencies are properly configured. Start by setting up Redis and RabbitMQ, which Postal uses for message queuing and caching.
Install Redis with:
sudo apt install redis-server -yThen, install RabbitMQ:
sudo apt install rabbitmq-server -yBoth services should start automatically, but you can double-check their status with:
sudo systemctl status redis-server

sudo systemctl status rabbitmq-server
Setting up Necessary Packages
To facilitate seamless operation, configure Postfix, a reliable mail transfer agent. Install it using:
sudo apt install postfix -yConfirm Postfix is correctly configured for your sending needs, including hostname settings aligning with your domain.
Next, adjust your firewall settings to permit Postal’s required ports, such as SMTP (25), SMTPS (465), and HTTP/HTTPS (80/443). Use UFW, a user-friendly firewall, to manage these rules:
sudo ufw allow 25,465,80,443/tcpMake sure UFW is enabled:
sudo ufw enableChecking System Requirements
Before rolling out Postal, verify your system meets the baseline requirements for smooth operation. Generally, you’ll need at least 2GB of RAM and a couple of CPU cores, especially if you plan to handle a substantial email load.
It’s wise to periodically check system resources using:
free -h

top
These commands help you monitor and ensure hardware specs align with your email dispatching plans. With everything configured and checked, you’re poised to start using Postal for effective email management.
Postal Configuration Steps
You’re almost ready to send emails, but first, let’s configure Postal to work with your specific setup. Begin by initializing Postal to set up basic configuration files if you haven’t done so yet:
postal initializeThis process creates a crucial YML file that we’ll edit next to customize Postal’s settings according to your email needs.
Editing the Postal YML File
Navigate to Postal’s configuration file located at:
nano /opt/postal/config/postal.ymlHere, you’ll define essential parameters like the web URL which points to your server’s domain or IP address, and details for connecting to your MySQL database.
Make sure to accurately set your SMTP settings and other essential services such as RabbitMQ and Redis. This step is key to ensuring Postal communicates correctly with its dependencies.
Ensuring Correct Port Binding
Postal requires specific ports to be open for different services. Double-check the bindings in your YML file:
SMTPshould be set to port 25 or 2525.HTTPfor Postal’s web interface defaults to 80.HTTPS, for secure connections, often uses port 443.
If there’s any port conflict, adjust them accordingly in the configuration file to match your firewall rules and server setup.
Once the configurations are set, restart Postal to apply changes:
postal startWith these configurations complete, you’re now ready to let Postal efficiently manage your email traffic.
Testing Postal Installation
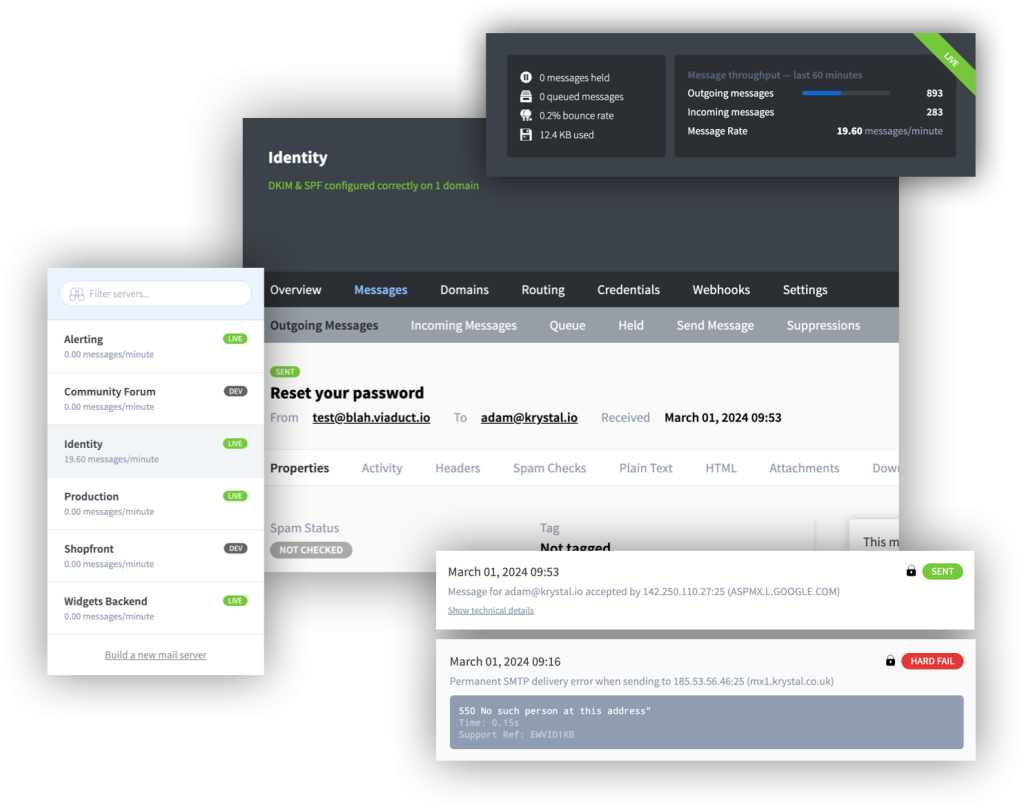
With everything configured, it’s time to ensure your Postal installation is functioning as expected. Begin by accessing the Postal web interface via your domain or IP address through a web browser.
Log in using the credentials you set during the installation. The interface should load smoothly, allowing you to navigate through the dashboard and settings. This initial interaction confirms that Postal’s web component is up and running.
Make sure to test sending a few test emails to different addresses. Check both the sending and receipt of emails to confirm that your SMTP settings are correctly aligned with your setup.
Running Diagnostic Commands
To further verify your Postal setup, use Postal’s built-in diagnostic commands. These commands help you confirm all services are functioning correctly and can identify any lurking configuration issues.
Start by checking Postal’s status:
postal statusThis command provides an overview of your active Postal services, indicating if all critical components are operational.
For a deeper inspection, run:
postal test-app-smtp [your-app-id]This command checks the SMTP configuration for your specific Postal app, ensuring emails are routed correctly.
These tests and diagnostics confirm that Postal’s installation is operational and ready for use. Regular monitoring and checks will help maintain a seamless email sending experience.
Conclusion on Installing Postal on Ubuntu 24.04
Congratulations! You’ve successfully navigated through the installation and configuration of Postal on Ubuntu 24.04. This journey, while requiring careful execution, empowers you with a powerful email management platform tailored to your needs.
Postal’s ability to handle substantial email loads effectively means you’re set for robust email communication. From initial system setup to configuring dependencies and testing, you’ve established a stable environment for Postal to thrive.
Remember, the key to maintaining a smoothly running mail system lies in regular updates and monitoring. Keep your server, Postal, and its dependencies up-to-date to ensure optimal performance and security.
Your new Postal setup is now ready to manage and streamline your email traffic efficiently. Enjoy the newfound control and reliability Postal brings to your communication strategy, and feel free to explore more of its features to enhance your email server capabilities further.


