Ever wished you had your own private Dropbox? OwnCloud turns that wish into reality! It’s an open-source tool that lets you host your own cloud storage, giving you control over your data without depending on third-party providers.
In this guide, we’ll walk through setting up OwnCloud on Ubuntu 24.04. With each step, you’ll see how user-friendly it is to create and manage your own cloud storage. Whether you’re looking to store documents, photos, or other files, this guide has got you covered.
Not only will you learn how to install OwnCloud, but you’ll also discover tips to efficiently configure it for smooth performance. So, grab your favorite beverage and let’s dive into setting up your personal cloud!
Installing Prerequisites for OwnCloud on Ubuntu 24.04
Before diving into the world of OwnCloud, let’s make sure our system is ready to host it. This starts with ensuring your Ubuntu 24.04 environment has all the tools and essentials in place to support a smooth installation process.
System Requirements for OwnCloud
While OwnCloud isn’t super demanding, having the right setup ensures everything runs effortlessly. You’ll need a server with at least 1GB of RAM and a decent amount of free disk space—preferably over 10GB, depending on your storage needs. A dual-core CPU will also help in maintaining efficient performance.
Updating Ubuntu and Installing Dependencies
First, let’s get everything up-to-date. Fire up your terminal and run:
sudo apt update && sudo apt upgrade -yThis command ensures your system is running the latest software, minimizing compatibility hiccups. Next, we’ll need few additional packages:
sudo apt install apache2 mariadb-server libapache2-mod-php7.4Apache serves as your web server, while MariaDB offers the database support OwnCloud requires. With PHP, you get the scripting language necessary for its functionality. Now that the prerequisites are in place, you’re one step closer to your personal cloud setup!
Downloading and Setting Up OwnCloud
Now that your system is prepped and ready, it’s time to bring OwnCloud into the mix. This section will guide you on grabbing OwnCloud from its official repositories and setting it up for first-time use.
Downloading OwnCloud from Repositories
First things first, we’ll grab OwnCloud from its official repositories to ensure we’re getting the latest, most stable version. Open your terminal and add the repository key:
wget -nv https://download.owncloud.org/download/repositories/stable/Ubuntu_24.04/Release.key -O Release.key
sudo apt-key add - < Release.key
After that, integrate the repository into your system’s package manager:
echo 'deb http://download.owncloud.org/download/repositories/stable/Ubuntu_24.04/ /' | sudo tee /etc/apt/sources.list.d/owncloud.listUpdate your system package list one more time:
sudo apt updateFinally, proceed to install OwnCloud:
sudo apt install owncloud-complete-filesConfiguring the OwnCloud Release Channel
Once Installed, it’s crucial to ensure that your OwnCloud is on the right release channel. This helps with staying updated on stable features and security improvements. By default, it sets to the stable channel, but double-checking never hurts. You can manage the release channel settings through the OwnCloud web UI, ensuring it matches your system objectives and preferences.
And voilà! OwnCloud is now set up on your server, ready to be configured as your personal cloud oasis.
Configuring the Database for OwnCloud
With OwnCloud installed, it’s time to set up a database to house all the data it will manage. This involves creating a new MySQL database and user exclusively for OwnCloud, ensuring your cloud solution has a robust backbone.
Creating a MySQL Database and User
First, log into the MySQL shell using:
sudo mysql -u root -pEnter your root password when prompted. Then, create a new database for OwnCloud:
CREATE DATABASE owncloud;Next, you’ll need to create a dedicated user for this database. Replace “ with a secure password of your choice:
CREATE USER 'ownclouduser'@'localhost' IDENTIFIED BY '';Setting Database Permissions for OwnCloud
To make sure OwnCloud can interact with its database without a hitch, grant all the necessary permissions:
GRANT ALL PRIVILEGES ON owncloud.* TO 'ownclouduser'@'localhost';Finally, flush the privileges to apply these changes:
FLUSH PRIVILEGES;Exit the MySQL shell by typing:
EXIT;With the database configured, you’re all set to tie it into your OwnCloud installation. This setup ensures your data is both secure and accessible for OwnCloud operations.
Finalizing OwnCloud Configuration on Ubuntu
With OwnCloud installed, it’s time to wrap things up by configuring it through the web installer and securing your setup for reliable performance.
Configuring OwnCloud through the Web Installer
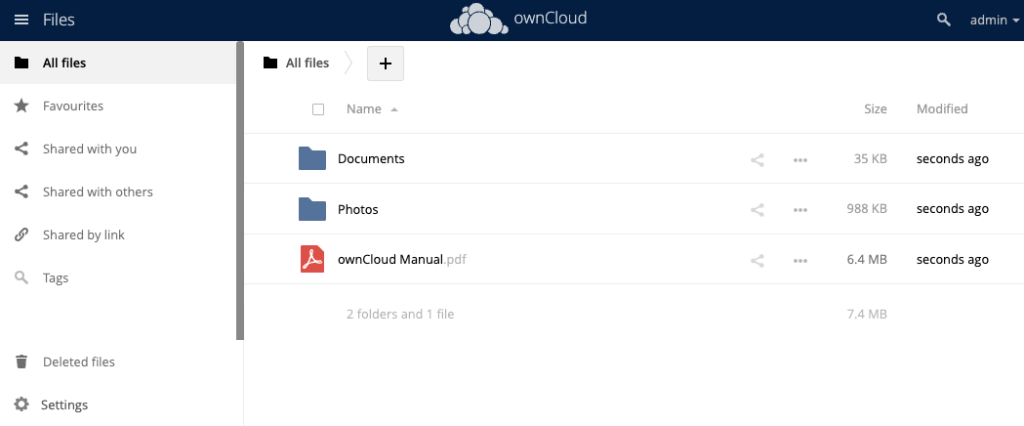
To start the configuration, open your web browser and head to your server’s IP address, followed by /owncloud. You’ll be greeted by the OwnCloud setup page.
Here, you’ll create an admin account by entering a username and strong password. Then, provide details for the data folder where files will be stored—usually, the default location is fine.
Next, enter the MySQL database information you set up earlier. Use owncloud as your database name and ownclouduser with the assigned password. Hit “Finish Setup,” and you’re almost there!
Handling Firewall and Security Settings
To protect your cloud, ensure your firewall allows traffic only to necessary ports, typically 80 (HTTP) and 443 (HTTPS) for web access. You can do this with:
sudo ufw allow 80,443/tcp
sudo ufw enable
It’s also wise to enable SSL for secure connections. Obtain a certificate using Let’s Encrypt, or install one from a trusted source. This encrypts data transmitted between users and your server, enhancing data security.
And that’s it—your OwnCloud is configured and protected, ready for use!
Conclusion
And there you have it—your very own OwnCloud setup on Ubuntu 24.04! By following these steps, you’ve effectively created a personal cloud environment where you control your data, ensuring privacy and accessibility.
With your system updated, dependencies installed, and OwnCloud configured, you’re all set to start storing and sharing your files securely. Plus, with a little configuration magic, you can even tailor OwnCloud to meet your specific needs.
Remember, while the initial setup might seem a bit technical, the payoff is a customizable cloud that’s entirely in your hands. Now, enjoy the freedom and peace of mind that comes with owning your data space! If you ever want to explore more features or need further assistance, the OwnCloud community is a fantastic resource. Happy clouding!


