Are you looking for a free and open-source media server to enjoy your favorite movies, music, and photos on any device? Jellyfin might just be the perfect solution for you. This comprehensive guide will take you through the straightforward installation and configuration process on the latest Ubuntu 24.04, ensuring you can easily stream your media without any hassle.
Jellyfin stands out as a versatile platform, serving your media content seamlessly across your devices. With Ubuntu 24.04 as its foundation, you’re promised not only stability but cutting-edge features and security updates.
By the end of this guide, you’ll have Jellyfin up and running on your Ubuntu system, optimized for efficiency and ease of use. Whether you’re a seasoned Linux enthusiast or a curious newcomer, this step-by-step tutorial is designed to welcome everyone aboard. Ready to dive into the world of hassle-free media streaming on your Ubuntu setup? Let’s get started!
Installing Prerequisites for Jellyfin on Ubuntu 24.04
Before diving into the Jellyfin installation, it’s important to set up your system with the necessary prerequisites. This ensures a smooth installation process and optimal performance. Let’s walk through these essential steps to prepare your Ubuntu 24.04 environment.
Update and Upgrade Your System
First things first, keeping your system up-to-date is crucial for security and stability. Open your terminal and run the following commands to update the package list and upgrade existing packages:
sudo apt update
sudo apt upgrade
These commands will refresh your package index and ensure you’re equipped with the latest updates, keeping those pesky bugs at bay.
Install Necessary Dependencies
With your system updated, proceed to install the required dependencies. Jellyfin needs a few packages to function smoothly. Execute the command below to get what you need:
sudo apt install apt-transport-https ca-certificates curl gnupg
These packages pave the way for a reliable installation process, allowing Jellyfin to interact properly with its repository and other system tools.
With your system primed and ready, you’re all set to move onto installing Jellyfin. Up next, we’ll delve into setting up the server itself. Stay tuned!
Downloading and Installing Jellyfin
With your Ubuntu 24.04 system prepped and ready, it’s time to bring Jellyfin onboard. The installation involves adding the Jellyfin repository and then downloading the package. Let’s break it down, step by step.
Add Jellyfin Repository
Before you can install Jellyfin, you need to add its repository to your system. This allows Ubuntu to fetch the latest Jellyfin packages directly. Open your terminal and use the following command to import the repository’s GPG key:
curl -fsSL https://repo.jellyfin.org/ubuntu/jellyfin_team.gpg.key | sudo gpg --dearmor -o /usr/share/keyrings/jellyfin-keyring.gpgNext, add the Jellyfin repository to your sources list:
echo "deb [signed-by=/usr/share/keyrings/jellyfin-keyring.gpg] https://repo.jellyfin.org/ubuntu jammy main" | sudo tee /etc/apt/sources.list.d/jellyfin.listThis setup ensures you receive updates directly from the Jellyfin team, keeping your media server current and secure.
Install Jellyfin Package
With the repository added, the Jellyfin package is just a quick installation away. Update your package list to include the Jellyfin repository:
sudo apt updateThen, proceed to install Jellyfin with the command:
sudo apt install jellyfinOnce completed, Jellyfin is ready to begin its role as your personal media server. The next steps will guide you through configuring and optimizing your new setup for the best streaming experience possible. Stay tuned!
Configuring Jellyfin Server
Once Jellyfin is installed, the next step is to configure your server so it can start serving your media. This involves some initial setup and tweaks to ensure everything runs smoothly and according to your preferences.
Initial Setup and Configuration
To get started, open your web browser and type in http://your-server-ip:8096. This will take you to the Jellyfin welcome screen. The setup process here is quick and user-friendly.
Begin by choosing your preferred language, then create an administrative account by picking a username and setting a strong password. This account will give you full access to manage and configure Jellyfin.
Next, you’ll be prompted to add your media libraries. Simply select the content types you want to manage, such as movies, TV shows, or music, and specify the directories where these files are stored on your system. This allows Jellyfin to organize and prepare your media for streaming.
Complete the setup by configuring remote access settings, if necessary, which lets you stream content away from home. Once finished, you’re ready to explore and enjoy your personal media server. Your Jellyfin server is now set up and tailored just for you. Happy streaming!
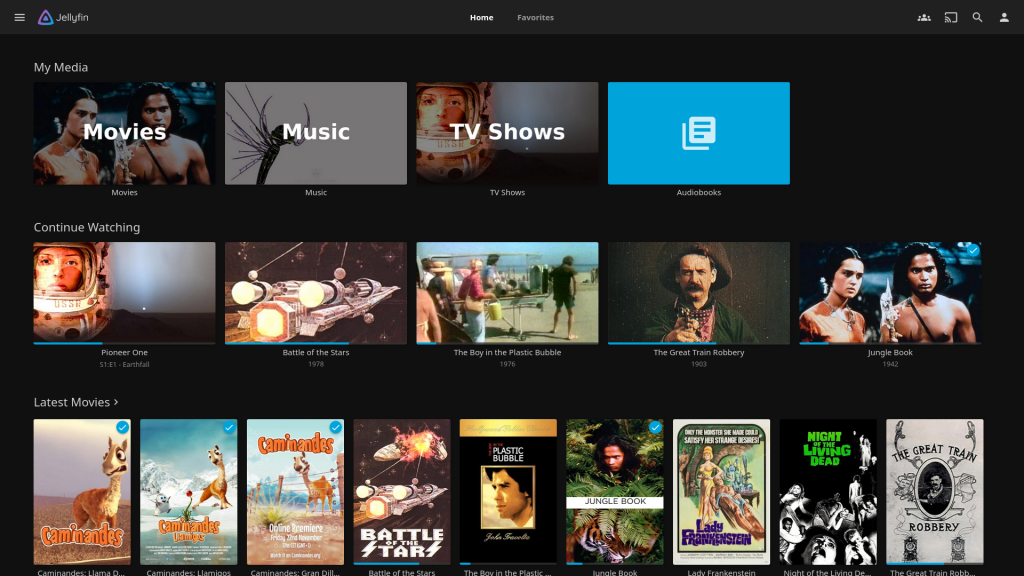
Accessing Jellyfin Web Interface
Once your Jellyfin server is running, it’s time to access the web interface, the control center for all your media management and streaming needs. The web interface is your gateway to configuring and enjoying Jellyfin’s features.
To access it, open up your favorite web browser and enter http://your-server-ip:8096 in the address bar. You’ll be greeted with the Jellyfin login or setup screen, depending on your configuration status.
The intuitive interface allows you to organize your media libraries, configure settings, and manage user accounts. It’s designed to be user-friendly, ensuring you can navigate and customize with ease. Remember, this is your command center for media enjoyment!
Configure Your Firewall for Jellyfin
To ensure Jellyfin is accessible not just locally but also externally from your network, configuring your firewall on Ubuntu is essential. This step will open the necessary ports for Jellyfin to communicate without hindrance.
If you’re using UFW (Uncomplicated Firewall) on Ubuntu, execute the following command in your terminal to allow Jellyfin traffic through:
sudo ufw allow 8096/tcp
This command opens port 8096, which Jellyfin uses by default. With your firewall configured, Jellyfin will be able to serve your content both securely and effortlessly across your connected devices. Enjoy the seamless streaming experience!
Conclusion: Successfully Set Up Jellyfin on Ubuntu 24.04
Congratulations! You’ve successfully transformed your Ubuntu 24.04 system into a powerful Jellyfin media server, ready to deliver all your favorite media content effortlessly to any device.
By following this guide, you’ve managed to install Jellyfin, configure it to meet your needs, and set up a secure environment for your media collection. You’ve mastered the foundational steps that ensure your server runs smoothly and efficiently.
Now, you can dive deeper into Jellyfin’s features, like personalizing user profiles, customizing the look and feel of your library, or exploring various plugins to extend its functionality. For more ideas, try integrating Nextcloud or other open-source solutions alongside Jellyfin to further expand your server’s capabilities.
Remember, with Jellyfin, the possibilities are endless, and your server is adaptable to future needs. Revisit your settings anytime to tweak and enhance your server’s performance and capabilities.
With your new setup, streaming your favorite media just became a breeze. Enjoy your personalized entertainment hub!


