Hestia Control Panel, or Hestiacp, is a powerful and intuitive control panel designed for managing web servers with ease. It’s an open-source solution that offers a straightforward interface, making server management accessible even for those with limited technical expertise.
Ubuntu 24.04, being one of the latest versions of this popular Linux distribution, boasts advanced features and improved security enhancements. Combining Ubuntu 24.04 with Hestiacp ensures a robust, efficient, and smooth experience for managing websites, databases, and email accounts.
This guide will walk you through the installation and configuration process of Hestiacp on Ubuntu 24.04. Whether you’re setting up a brand new server or upgrading an existing environment, you’ll find clear instructions and practical tips to get your web hosting environment up and running quickly.
Get ready to streamline your server management processes and unlock the full potential of Ubuntu 24.04 with the versatile capabilities of Hestiacp!
System Requirements and Preparations for HestiaCP Installation
Before diving into the installation of Hestiacp on Ubuntu 24.04, it’s crucial to ensure your server meets the necessary requirements and is properly configured for a smooth setup process.
First, check your system specifications. Hestiacp requires a minimum of 2 GB RAM and at least 20 GB of disk space to function efficiently. Having a solid network connection is also vital for maintaining server stability, especially if you’re planning on hosting multiple websites.
Next, ensure your server is running a clean, up-to-date installation of Ubuntu 24.04. This means no previous control panels or unnecessary software that might interfere with Hestiacp should be present.
You’ll also need to make sure your system is running the latest software updates. Running sudo apt update && sudo apt upgrade in the terminal will ensure all your packages are current.
Finally, verify that your firewall settings allow incoming connections on necessary ports like HTTP (80), HTTPS (443), and SMTP (25). Basic server security practices, such as having SSH access configured correctly, are also recommended.
With these preparations complete, you’re all set to begin installing Hestiacp on your reliable Ubuntu 24.04 server!
Installing HestiaCP on Ubuntu 24.04
Installing HestiaCP on your Ubuntu 24.04 server is a straightforward process, thanks to its automated installation script. Let’s break it down step by step.
Downloading the HestiaCP Installation Script
First, you’ll need to download the installation script provided by HestiaCP. Open your terminal and run the following command to retrieve the script with wget:
wget https://raw.githubusercontent.com/hestiacp/hestiacp/release/install/hst-install.sh
This command downloads the script necessary for installing HestiaCP directly from their official repository, ensuring you get the most up-to-date version.
Running the Installation Script
With the script downloaded, it’s time to kick off the installation. Make sure to give the script execution permissions using the following command:
chmod +x hst-install.sh
Once done, execute the script by running:
sudo ./hst-install.sh
The installer will prompt you to confirm the installation and specify components you might want to include. Follow the on-screen instructions, and allow the process to complete.
In a matter of minutes, HestiaCP will be installed, ready for further configuration, and you’ll have access to its user-friendly web interface.
Post-Installation Configuration of HestiaCP
Once HestiaCP is installed on your Ubuntu 24.04 server, the next step is to configure it to suit your needs.
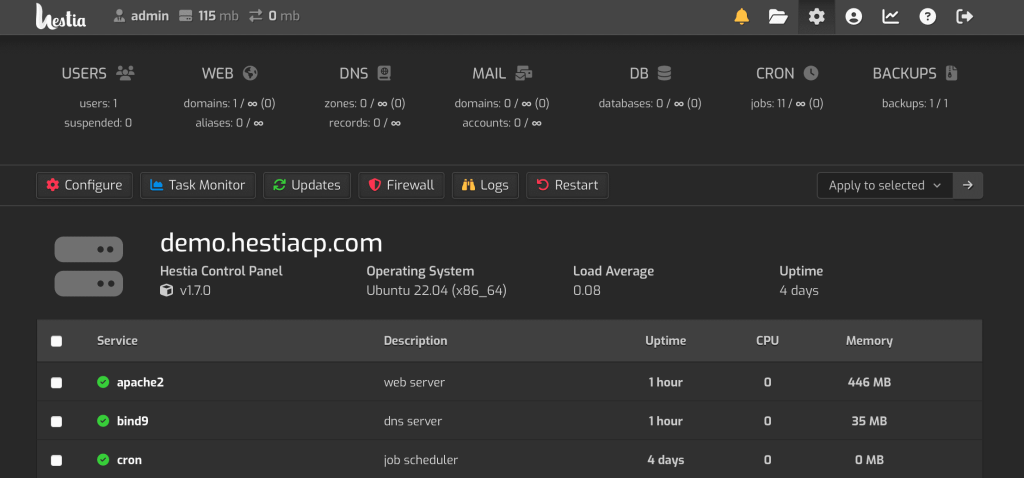
Start by logging in to the HestiaCP web interface using the credentials provided at the end of the installation process. The interface is intuitive, designed to highlight crucial dashboard elements clearly.
First, set up your admin account by navigating to the “User” section. Update your password and email address to ensure the security and accessibility of your admin account.
Next, add your domains under the “Web” section. Just click “Add Web Domain,” input your domain name, and configure DNS settings as necessary. Ensure your DNS records are correctly set up to point to your server’s IP address.
After that, configure your mail server. HestiaCP allows you to create and manage mail accounts quickly; navigate to the “Mail” section, click on “Add Mail Domain,” and follow the prompts to set up email addresses associated with your domains.
Lastly, don’t forget to set up regular backups. Under “Backup,” configure automatic backup schedules to safeguard your data and make restoring your server a breeze if needed.
These fundamental steps will ensure your HestiaCP configuration suits your web hosting requirements efficiently and securely.
Essential Security Settings for HestiaCP
Once HestiaCP is installed and configured, implementing some essential security settings is crucial to protect your server and data.
Start by changing the default admin password. Strong passwords are your first line of defense, so make sure it’s complex, containing a mix of letters, numbers, and symbols.
Next, enable SSH key authentication. This method provides an extra layer of security compared to password-based login. Generate a key pair on your local machine and configure your server to accept the public key, enhancing security significantly.
Configure a firewall to allow only necessary traffic. HestiaCP has built-in firewall management that makes it straightforward to control which services are accessible from the outside world. Ensure ports for services you aren’t using are closed.
It’s also wise to enable regular software updates. Keeping your server’s software up-to-date ensures you’re protected against known vulnerabilities.
Finally, consider setting up two-factor authentication (2FA) for your HestiaCP login. This adds another layer of security by requiring a secondary form of verification, typically a code sent to your mobile device.
By implementing these settings, you’ll safeguard your server and reduce the risk of unauthorized access.
Conclusion
Congratulations! You’ve now successfully installed and configured Hestiacp on Ubuntu 24.04. With its user-friendly control panel, managing your web server has never been easier.
By following this guide, you’ve ensured your server is not only up and running but also secure and optimized for performance. The essential settings and configurations you’ve implemented will help you manage domains, email accounts, and databases effectively.
Remember, regular maintenance and updates are crucial in keeping your server secure and efficient. With Hestiacp’s intuitive interface, these tasks are more approachable, even for those new to server management.
Whether you’re hosting a personal project or scaling up for business needs, you now have a solid foundation to build on. If you’re ready for even more customization and features, don’t forget to explore additional Hestiacp plugins and extensions to further enhance your server’s capabilities.
Happy hosting!


