Ready to elevate your productivity on Ubuntu 24.04? Look no further than Appflowy—a dynamic, open-source alternative to traditional workspace tools. Whether you’re managing complex projects or organizing day-to-day tasks, Appflowy provides a customizable platform to enhance your workflow.
In this guide, we’ll walk you through the seamless installation and configuration process of Appflowy on your Ubuntu system. From setting up dependencies to exploring its rich features, we’re here to ensure your setup is smooth and efficient.
Stay tuned as we embark on this step-by-step journey to transform your productivity game with Appflowy!
Download and Install Appflowy on Ubuntu 24.04
First, let’s ensure your system is up-to-date. Open your terminal and run:
sudo apt update && sudo apt upgrade -yWith your system ready, it’s time to download Appflowy. Head over to the Appflowy GitHub Releases page to find the latest version for Ubuntu. Click the appropriate .deb package link to start the download.
Once downloaded, navigate to your downloads directory using the terminal:
cd ~/DownloadsNow, let’s install Appflowy. Execute the following command:
sudo dpkg -i appflowy-x.x.x.debReplace x.x.x with the version number you downloaded. If you encounter any dependency issues during installation, resolve them using:
sudo apt --fix-broken installThat’s it! Appflowy is now installed on your Ubuntu system. Next, we’ll dive into configuring this powerful tool for your specific needs.
Configure Appflowy Initial Settings
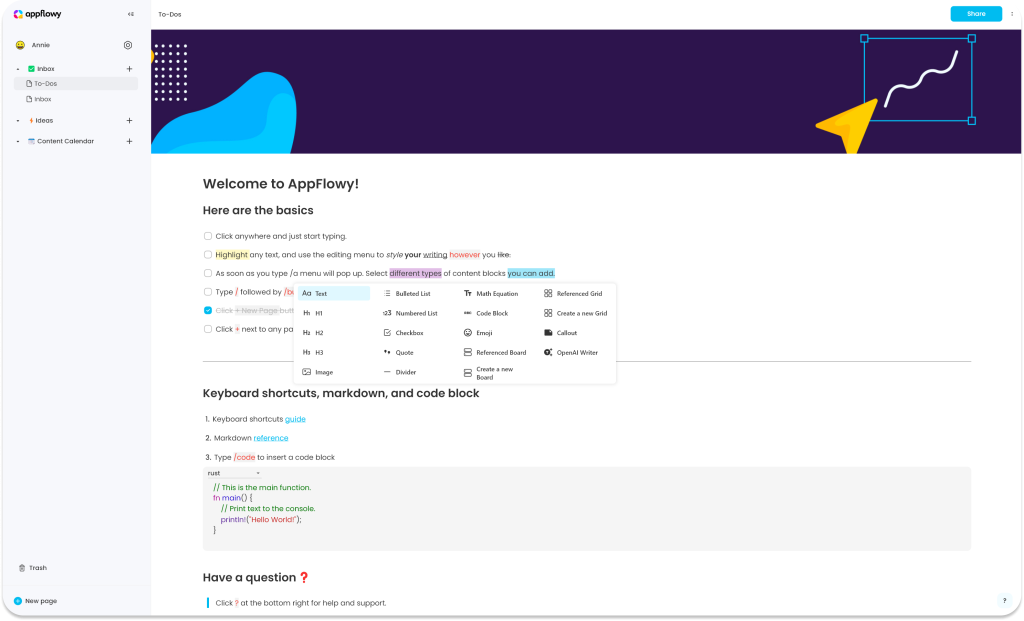
First things first, launch Appflowy from your applications menu. Upon opening, you’ll be greeted with a friendly welcome screen designed to get you started quickly.
Begin by creating a new workspace if prompted. Think of this as your personal digital notebook where all your projects, notes, and tasks will reside. Give it a name that resonates with your purpose, and you’re ready to dive in!
Next, explore the customization options to tailor Appflowy to your taste. In the settings menu, you’ll find themes and layout preferences. Choose a theme that feels right—whether it’s light for a fresh start or dark for those late-night brainstorming sessions.
Head over to the integrations section to link any tools or services you frequently use. This ensures everything you need is just a click away. Don’t forget to adjust notification settings to keep you informed without overwhelming your focus.
Finally, take a moment to explore some sample templates. These can spark inspiration and provide a helpful structure as you begin crafting your projects within Appflowy. You’re now all set to flex your creative muscles and start organizing like a pro!
Set up Appflowy User Account
Once Appflowy is launched, setting up your user account is a breeze. Start by clicking on the profile icon located at the top-right corner of the interface.
You’ll see an option to create a new account. Enter your preferred username and a secure password. This ensures your workspace is personalized and protected.
To optimize your experience, consider linking your Appflowy account with third-party apps you frequently use. This can be done through the integrations menu and helps keep everything centralized.
After setting up your account, take a moment to update your profile with a profile picture and other details. This adds a personal touch to your workspace environment.
Your Appflowy user account is now set up and ready to power your productivity. Get ready to explore endless possibilities as you dive into organizing and managing your tasks efficiently!
Verify Appflowy Installation on Ubuntu
After installing Appflowy, it’s essential to ensure everything is running smoothly. Let’s verify the installation together!
First, open your applications menu and search for “Appflowy.” If you spot the Appflowy icon, you’re already halfway there. Click to launch the application, and watch for any error messages during startup—none means we’re all set!
Once Appflowy is open, take a quick tour of the interface. Create a new document or browse the available templates to ensure all functionalities are working as expected.
For extra peace of mind, use the terminal to verify the installation. Run:
appflowy --versionThis command should return the Appflowy version you just installed, confirming everything is correctly in place.
With Appflowy up and running, you’re now ready to harness its power and functionality. Dive in and start organizing!
Conclusion: Optimizing Your Appflowy Setup
Congratulations on setting up Appflowy on your Ubuntu 24.04! With the installation complete and initial configurations tailored to your needs, you’re ready to dive into a world of productivity.
Consider spending some time exploring additional integrations to link Appflowy with your favorite tools. This can streamline your workflows and keep everything in one place, boosting efficiency.
Take advantage of customizable templates to suit various projects and tasks. These can save you time and provide structure as you plan and organize.
Regularly update Appflowy to enjoy the latest features and improvements. Staying updated ensures your workspace remains secure and optimized.
Remember, the real magic of Appflowy lies in its flexibility, so feel free to tweak settings as your workflow evolves.
Here’s to a more organized, productive digital life with Appflowy!


